Showing posts with label box card. Show all posts

Sunday, January 3, 2016

Get Well Soon

Hello!  Thanks for stopping by
 
Life can change in the blink of an eye.  My friend from school was in a horrible car accident with her family.  She was in ICU for a few days and was not allowed flowers.. etc.. So I had in my mind to make a flower card.
 
Luckily, she is a fighter and no longer in ICU, but I will still be giving her this card in hopes it can bring a smile to her.
 
I LOVE box cards.. What I didn't love about them is the long labor it took to mark, measure, cut, score..  On Black Friday The Stamps of Life had a NEW die set over half off for the sale and I JUMPED!!  It's a box card die!  How genius .. it does all the world for you!!  Cuts and scores and all you need to do is fold and assemble one little piece!!  Easy Peasy!!!
 
I chose to use the flowers that come with the die set.  There are TONS of dies that come in this and will get so much use out of this purchase.  The possibilities are endless with box cards.  They can lay flat to mail as well.
 
 
Close up of the center portion of the box card
 
 
The back of the card.  You can leave these blank or decorate as you wish.

 
Thank so much for stopping by!  I hope that you were inspired to craft from my post. 
Happy Crafting
~Kara


Thursday, September 24, 2015

Thank you box card

Hello!  Thanks for stopping by today.  When I said before, that box cards would be my go to.. I wasn't joking!
 
My Dad and Step Mom had over 10 Monarch Butterflies hatch this year.  This was a childhood event we always did as I grew up.  I was thrilled to hear my Dad found some caterpillars this year.  If you have never experienced this part of life, it's amazing and I definitely recommend you do this some fall.
 
So, when I created this card I knew I wanted Monarch Butterflies and I also needed to send them a Thank you for everything they do for me.
 
I started off going through my collection and my go to sets are always from Heartfelt Creations.  I adore these sets (any of them) and low and behold.. the Butterfly Medley was PERFECT!.
 
I started my box card following the directions I previously had followed.  I found a stellar tutorial on YouTube and wrote all of her exact measurements down.  It comes out perfectly each time I make this style of card.
 
As I assembled this card, the paper was way to plain for my liking.  I took a large stamp from a collection and stamped white on what I wanted to show.  Since I already had the cardstock glued down, I had to lay the section and press on the stamp to give it the stamped image.  I was ok with whatever came out.  I really didn't want a 'perfect' image..  It turned out fabulous!!  I stamped the large back panel as well.  I was still able to write my sentiment as I made this stamped image as light as I could.


I stamped the butterfly medley (using the MISTI tool) and embossed with clear powder. It was then time to color my butterflies to resemble Monarch's.  I used my Zig Brush markers.  I absolutely love these markers.  I never claim to be a color professional, but I do like the outcome with these markers.


Behind all of these beautiful butterflies, I wanted some sort of flower to be in the background.  When all of the butterflies were hatching, I was away and so my Dad sent me pictures of each butterfly on a flower.  So I wanted to incorporate a flower of some sort.
 
I used the perfect stamp and colored again with my Zig Brush Markers.  I tried my best to use the ink where I wanted it most.  I then embossed to make the coloring a bit easier.


I attached the butterflies using transparency film.  I wanted them to 'sway' a little so this works perfect.  I put dabs of liquid pearls (Opal White) on the wings of the butterflies to resemble Monarchs.
 
This card turned out incredible.  Purple is my favorite color, so of course I thought it was near perfection. LOL!  I used some liquid pearls for the buds in the flowers.  The purple I had colored with mixed with the white opal I put down.  It turned out ok, however I'd wait longer for the Zig's to dry next time. 


Thanks so much for stopping by!  I hope you enjoyed this Monarch Butterfly card.
 
~Kara


Friday, September 18, 2015

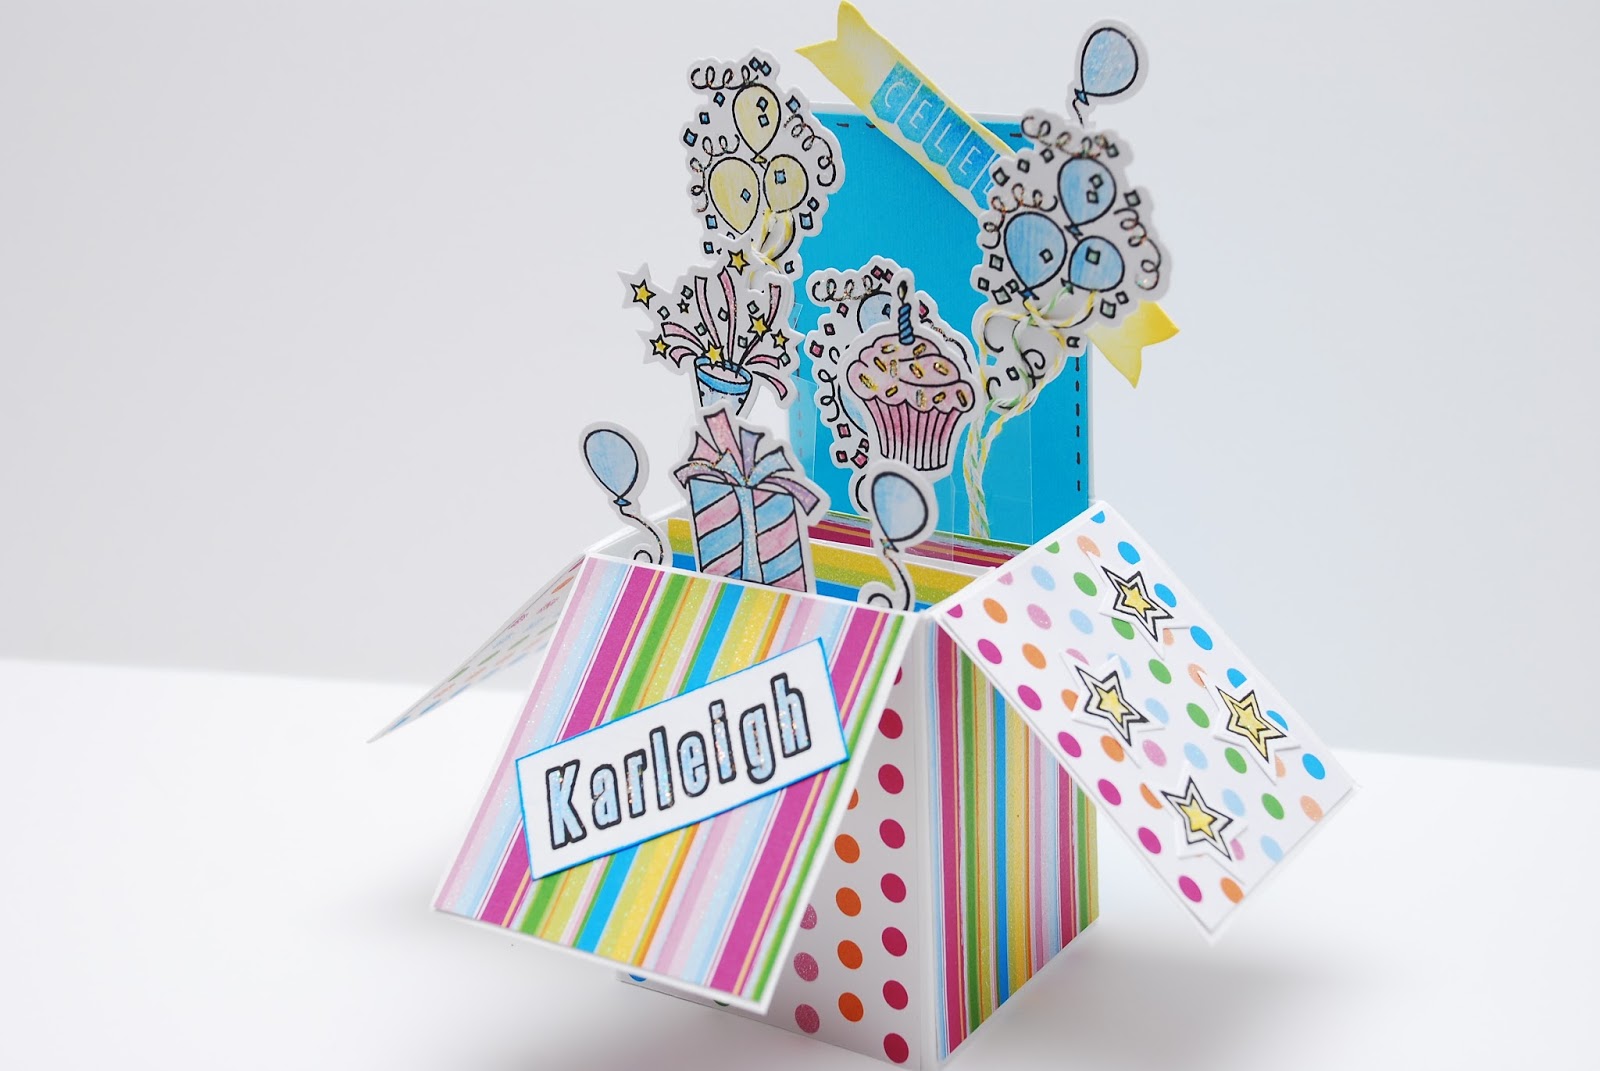
Happy Birthday Box Card

Hello!  Thanks for stopping by
 
I have had a box card on my wish list for quite some time.  I've seen so many extravagant box cards and also some simple cards.
 
I study up on how I want to go about a card via Youtube, Pinterest and Google.  How do you get inspiration or instructions?
 
I found the exact size I wanted and rolled with it.  It truly is not that hard to make.  I found the hardest part deciding how I wanted to place the embellishments.
 
I started out with the 12x12 white base I wanted.  Using my scoring board and cutter, I cut and scored where needed.  Ending with the box base to be decorated. 


I then cut all of my panels needed.  I knew I wanted the card to be bright and fun for a 7th birthday card.


After I had all of my panels cut,  I used scor tape for a secure hold .


I assembled placed all of the panels onto the box base before I made the final box.  After reading several tutorials, I came to the conclusion that placing the panels on flat would be easiest.  I agree, it would have been tough to do with the box already in box formation.
 
 
Next step was to place the dividers into the center.  I used glue for this.  I wanted a tiny bit of leeway to move it around if need be.
 
Next task was to decide what embellishments I was going to use.  I decided on the Die-Versions stamp set, Make-a-Wish-Stamps and Make-a-Wish-Dies.  I colored in each embellishment with colored pencils and used stickles to accent the confetti. I also added some twine to the balloon strings.
 
Placing these embellishments seemed to be my hardest task of the entire project.  I used transparency film to hold the embellishments.  I knew I wanted a few to be higher than the first layers.  Here is a look from the top.  I ended up covering the original white dividers I had in there.  Using the colorful cardstock from the panels.


It turned out so gorgeous and I am so happy with it.  I can see this style will become my go to and additive card.
 
The celebrate banner came from craftindesertdivas and the banner die cut came from Simon Says Stamp.
 
What kiddo doesn't like a personalized item.. Especially, names you can never find.  Karleigh came from the beautiful set from Studiol2e - Wuwu set
 
The back panel can be used for more embellishments or for your note to the person receiving.  It was 1 am when I was finishing this, so I went with a simple note on the back with some stamps from Craftin' Desert Divas
 
Thanks so much for stopping by!  I'd love to hear your feedback..
 
 
When stopping by Die-Versions, be sure to use the code kara15 for 15% off your order.  Not valid with sales or discounts.