Showing posts with label craftin desert divas. Show all posts

Monday, November 21, 2016

Primitive Christmas


 Hello!  Thank you so much for stopping by

I had time to play around with a few dies from the November release at Craftin Desert Divas and oh my oh my.. my new favs! The Winter Wonderland dies are FUN!

This is the mood board inspiration for November.  When posting on social media, be sure to use #cddmonthly and also join the Facebook group to share your creation.  Here is the group link  https://www.facebook.com/groups/1428163220758119/


1.  I first took a kraft card base 5 x 6.5.  I buy my card bases at Michaels and love that they come with envelopes.
2.  I then laid out all of my card stock I wanted to use.  I made this card with the intention of following the November mood board from Craftin Desert Divas.
3.  I then cut with the picture frame die my bottom layer. 
4.  Next, I cut from the Fancy Frames my next layer.  This is by far my staple of dies.. You must have it LOL!
5.  I then cut the lantern die and candle
6.  Using the Winter Wonderland die set (which is packed full of amazingness) I cut the poinsettia in 4 different shades of brown/beige.  I cut 4 of each so I could layer the poinsettias.  There is a dotted crease on the poinsettia that allows you to nicely shape the flower if you'd like.  I did and it gives it such dimension.
7. Layering the poinsettia to whatever I felt looked nice, I glued them together and placed accordingly on my card.
 
 
 I hope you have enjoyed this card! 


Monday, November 7, 2016

Give Thanks

Hello!  Thanks so much for stopping by.  Kara here from Create By Kara
 
Today I would love to show you a simple card created with a digital stamp called Scarecrow with a fence and can be found here.   When using a digital stamp, do not be intimidated!  I use a Brother Laser Printer for my digi stamps.  They are fun to use as you can make them any size you need. 

1.  I printed the Scarecrow with a Fence digi and colored with Spectrum Noir markers
2.  Next I used the Brother Scan N Cut to trim around the edge.  Don't think you need this device to use a digi.  You could simply use a die from the Fancy Frames selection and cut a frame or base.  You do not need to cut to be able to use these.
3.  I then took the Fancy Frame die set and cut a rectangle on white card stock. 
4.  Using the Outdoor Landscape die set, I took the hill die and cut to use as a mask.  I then laid the mask down and with the Clarity Stencil Brushes I brushed on the blue for the sky.  After the sky I used the other half of the mask and proceeded to brush on the grass color.  I set this aside while I compiled the other parts of my card.
5.  I then took brown card stock and cut 6.25 x 4 and embossed with an embossing folder.  I took brown ink and edged around the sides.  Let this dry completely.. I did not.. so learn from my lesson, LOL!
6.  I then took orange card stock and  trimmed 5.75 x 2.5.  Edged this in orange ink. 
7.  Using the Give Thanks from Thankful Squeaks stamp set and my MISTI.. I stamped the bottom right corner.
8.  I then layered the brown and orange as I wanted and added brown ribbon for a bit of interest.  I attach my ribbon using tape on the back of my card stock.  I then added the white hill piece and glued down my digi scarecrow.
9.  Finally, I added spectrum noir sparkle glitter pen on the pumpkins and sunflower.  The photo may not catch the sparkle.  Also adding a few sprinkles from Dooglebug to the bottom left corner to add the final touches. 


Saturday, September 17, 2016

You've got this!

Hello!  Thanks so much for stopping by
 
It is the 17th of September and that means it is your monthly reminder to do a self check breast exam.  I am truly honored to participate each month in this blog hop.  This months theme is Girl Power!


CAS-UAL FRIDAY's  has their own line of stamps and dies mainly for Breast Cancer cards and it is called Calling All Sistahs and 50% of the profits from the sales of the Calling All Sistahs line goes to the National Breast Cancer Foundation, Inc. for research and medical help.  Check out the line here.  Anyone is welcome to participate in the Blog Hop that happens on the 17th of each month. 
 
**There will be a $15 Gift Certificate given to 3 people that comment along the hop.**   Comments close on September 19th at midnight EST.


Your next stop on the hop is the talented Jeanne Jachna

You can learn all about how Calling All Sistahs got started here.

If you are a facebooker, we'd love for you to join us in our Facebook group! Click here to join
This group is for hop stops, hoppers, and anyone interested in Calling All Sistahs :)
 
If you should get lost along the way please go back to the CAS-ual Fridays Calling All Sistahs Blog Hop.  
 
So remember we have all come together for this blog hop to encourage our Sistahs to do their monthly breast self-exams and yearly mammograms!!
 
I highly encourage you to join in on this fun blog hop by participating.   The more awareness we create.. the more lives we can save.  Just a simple self check can save your life and the life of a friend.
 
Here is my card for the hop!

Cas-ual Fridays products used:
Curtis Background:  http://cas-ualfridaysstamps.com/products/curtis-background
Calling all Sistahs:  http://cas-ualfridaysstamps.com/products/calling-all-sistahs
Dream then Do:  http://cas-ualfridaysstamps.com/products/dream-then-do

Other Products used: 
So Suzy Ink bites:  http://www.sosuzystamps.com/summer-solstice-ink-bite-set/
Craftin Desert Divas shaker tag dies: http://craftindesertdivas.com/shaker-tag-dies/


Your next stop on the hop is the talented Jeanne Jachna


Saturday, August 27, 2016

Thankful for you

Hello!  Thanks so much for stopping by
 
Today I want to share a super quick card I created using a digital file from Craftin Desert Divas called Delightful Daisy.  I used Zig Clean Color Markers on Bristol watercolor paper to achieve the look I was going for.

I print my images using a Brother laser printer.  I have found this printer is great with all mediums and paper. 


I cut two colors of greens for my grass using the Landscape die set.  I then took the Stitched Scallop die to make a cloud in the sky.  To cut my digital flower I used the Brother Scan N Cut.  I never was good with scissors, so this machine for me was a life saver. 

I then pieces it all together for this quick card and stamped Thankful for you from the Thankful Squeaks stamp set.  Added a few sequins and a few dots with a white gel pen..  and complete! 


CDD Products used:
Delightful Daisy - http://craftindesertdivas.com/delightful-daisy-digital-stamp/
Landscape dies - http://craftindesertdivas.com/outdoor-landscape-dies/
Stitched Scallop Dies - http://craftindesertdivas.com/stitched-scallop-dies/
Thankful Squeaks - http://craftindesertdivas.com/thankful-squeaks/
Pastel Paradise sequins -   http://craftindesertdivas.com/pastel-paradise-sequins/


Monday, August 15, 2016

You're Amazing! Flower Pot

Hello!  Thanks so much for stopping by
 
Today I wanted to create and show you a neat teacher gift idea.  I found the general idea from Pinterest, but put my own spin by personalizing the bucket. 
 
 
I first cut out the digital images from Craftin Desert Divas called Flower Power.  I printed and then cut with the Brother Scan N Cut.


I then wanted a more finished edge look so I took a marker and just ran it around the outside of each flower. 


To prepare the bucket I simply took some floral foam and hot glued that to secure it.  I then personalized the bucket with Mrs. Langdon.  I have no children, but she ordered a few wreaths from me and she has been a teacher for over 25 years.. so I thought it would be nice to gift her this. 

 
I then shredded some green cardstock for my grass. 


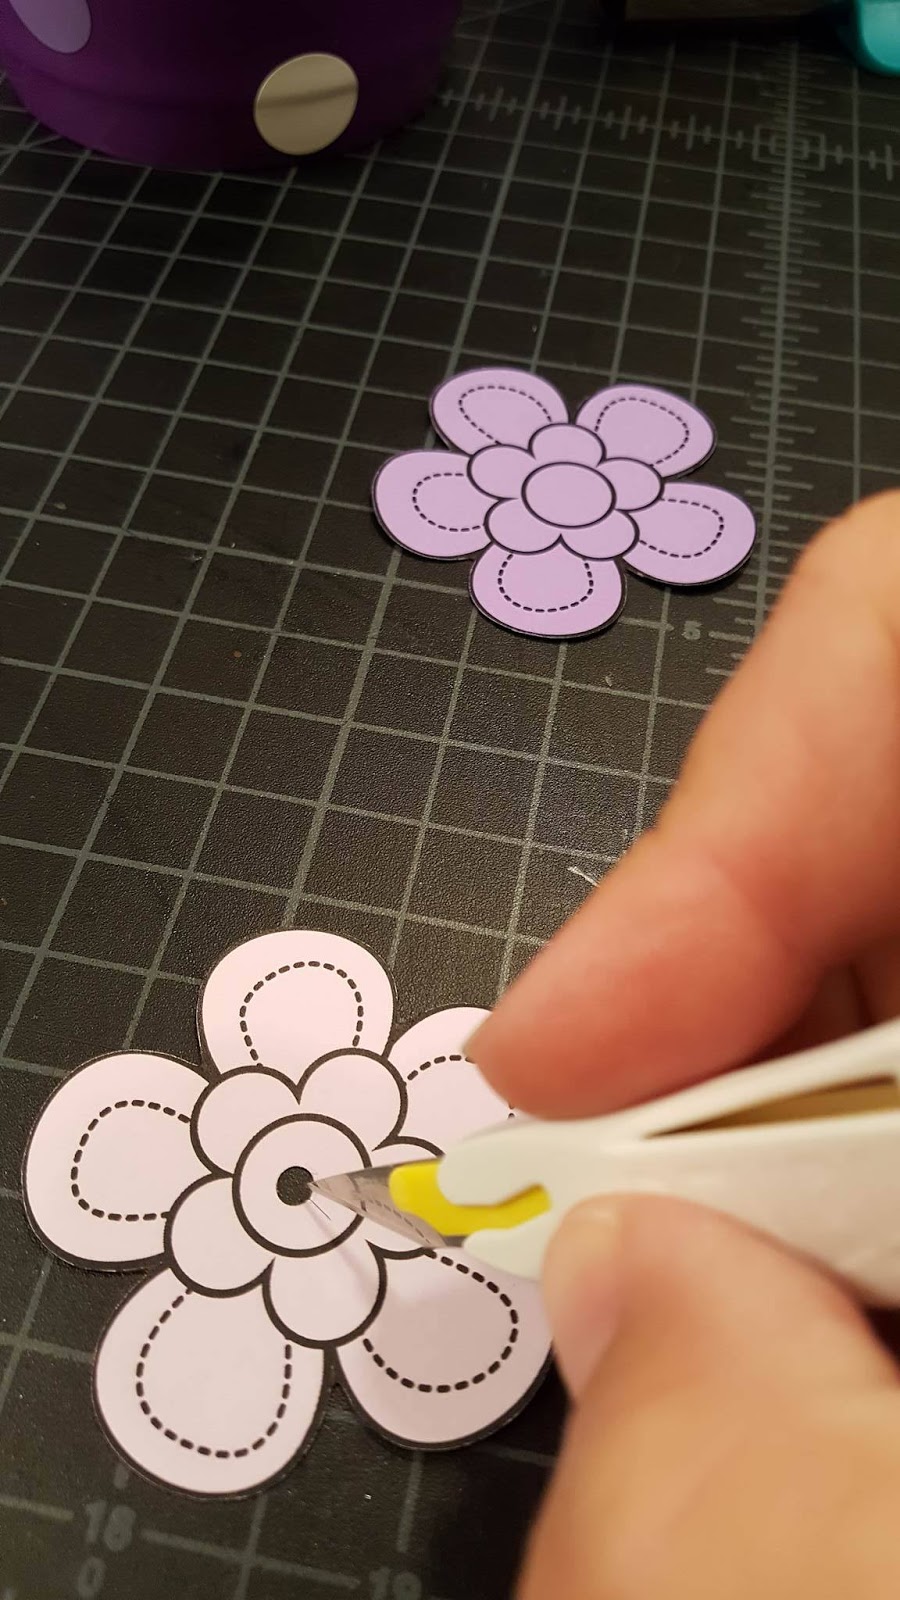
I then took the digi flower and placed a hole in the center. I didn't the hole too large so I then took my penblade and made little slits so that it could fit over the pencil eraser.


I then placed each pencil random places in the bucket.    I made a tag that I will place on the handle, but for photo purposes I placed it in the grass.  I will write my message on the back of the tag.


The final project is super cute!  I just know she will love it!


Craftin Desert Divas products used:
 
Flower Power Digi: http://craftindesertdivas.com/flower-power-digital-stamp/
Wishful Thoughts: http://craftindesertdivas.com/wishful-thoughts/
Tiny Sentiments: http://craftindesertdivas.com/tiny-sentiments/
Fancy Stitched Label Dies: http://craftindesertdivas.com/fancy-stitched-label-dies/

Tuesday, July 26, 2016

One Sheet Wonder - 10 cards

Hello!  Thank so much for stopping by

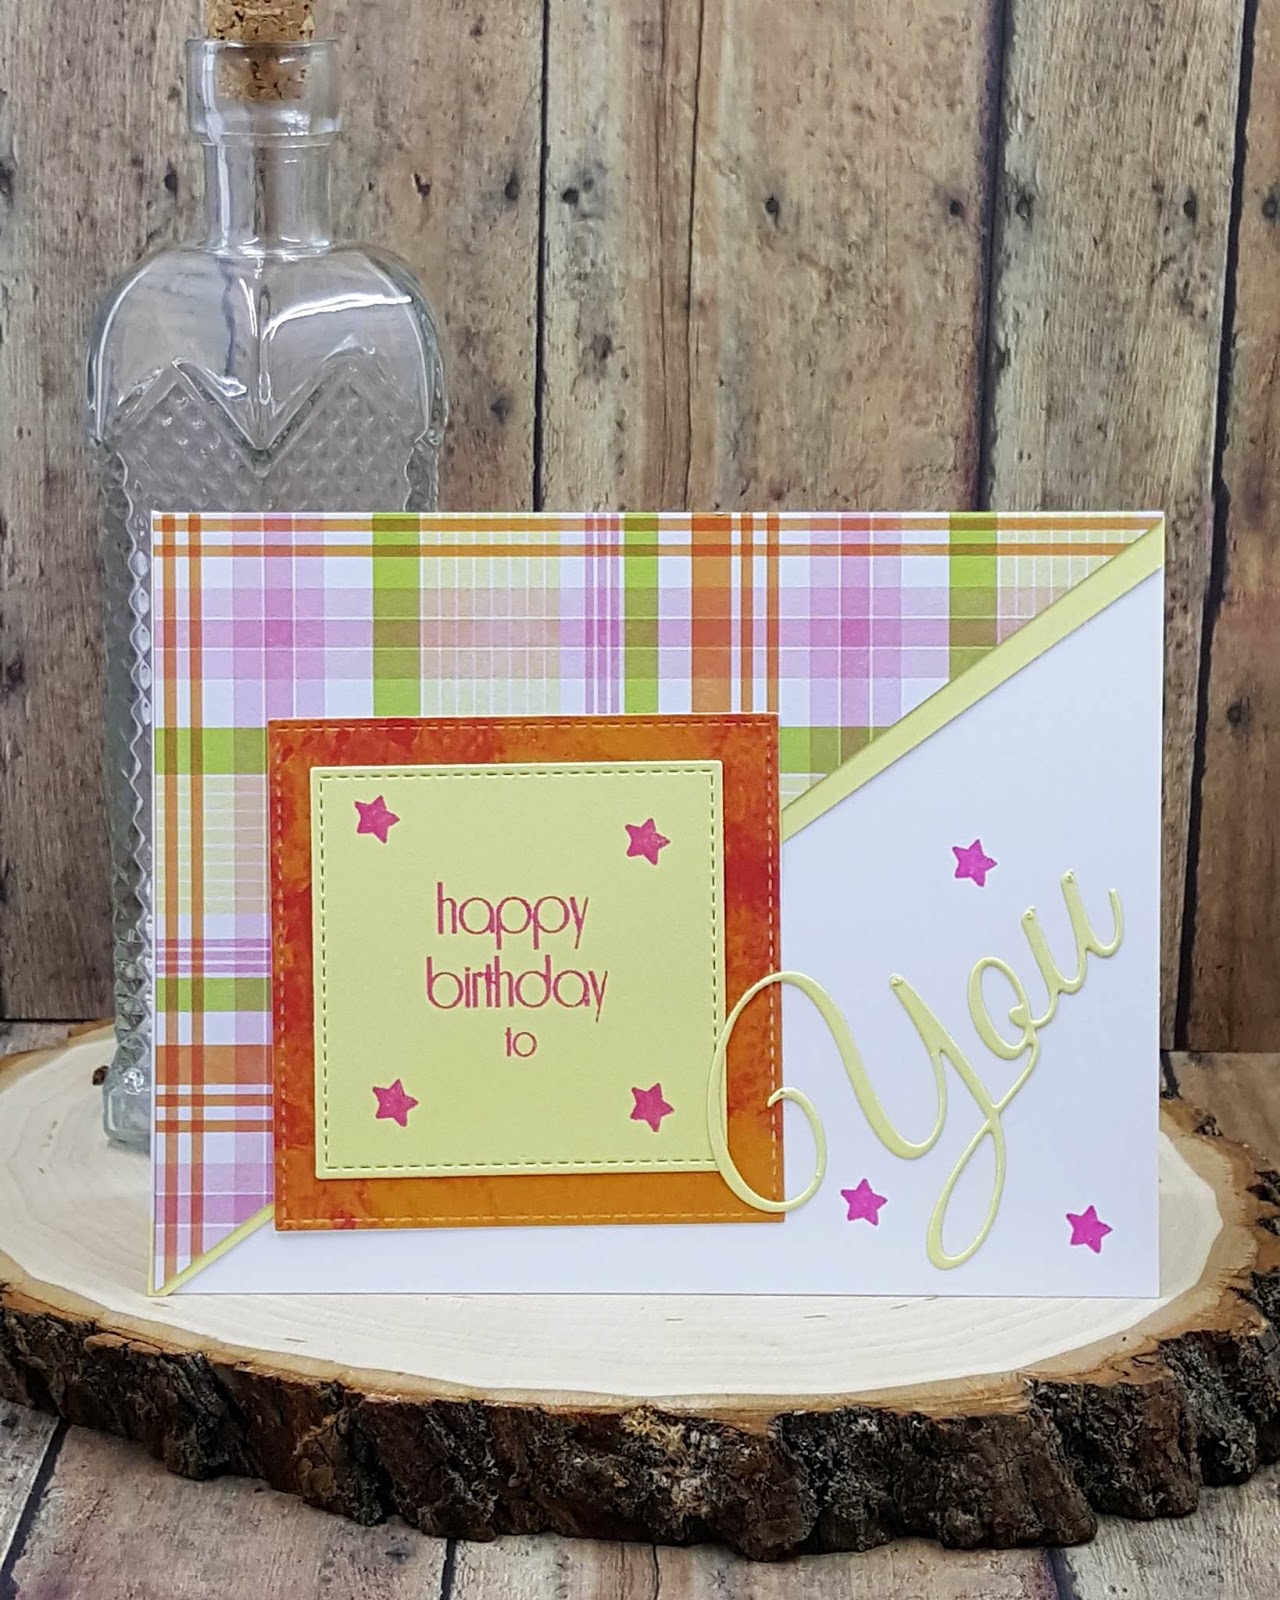
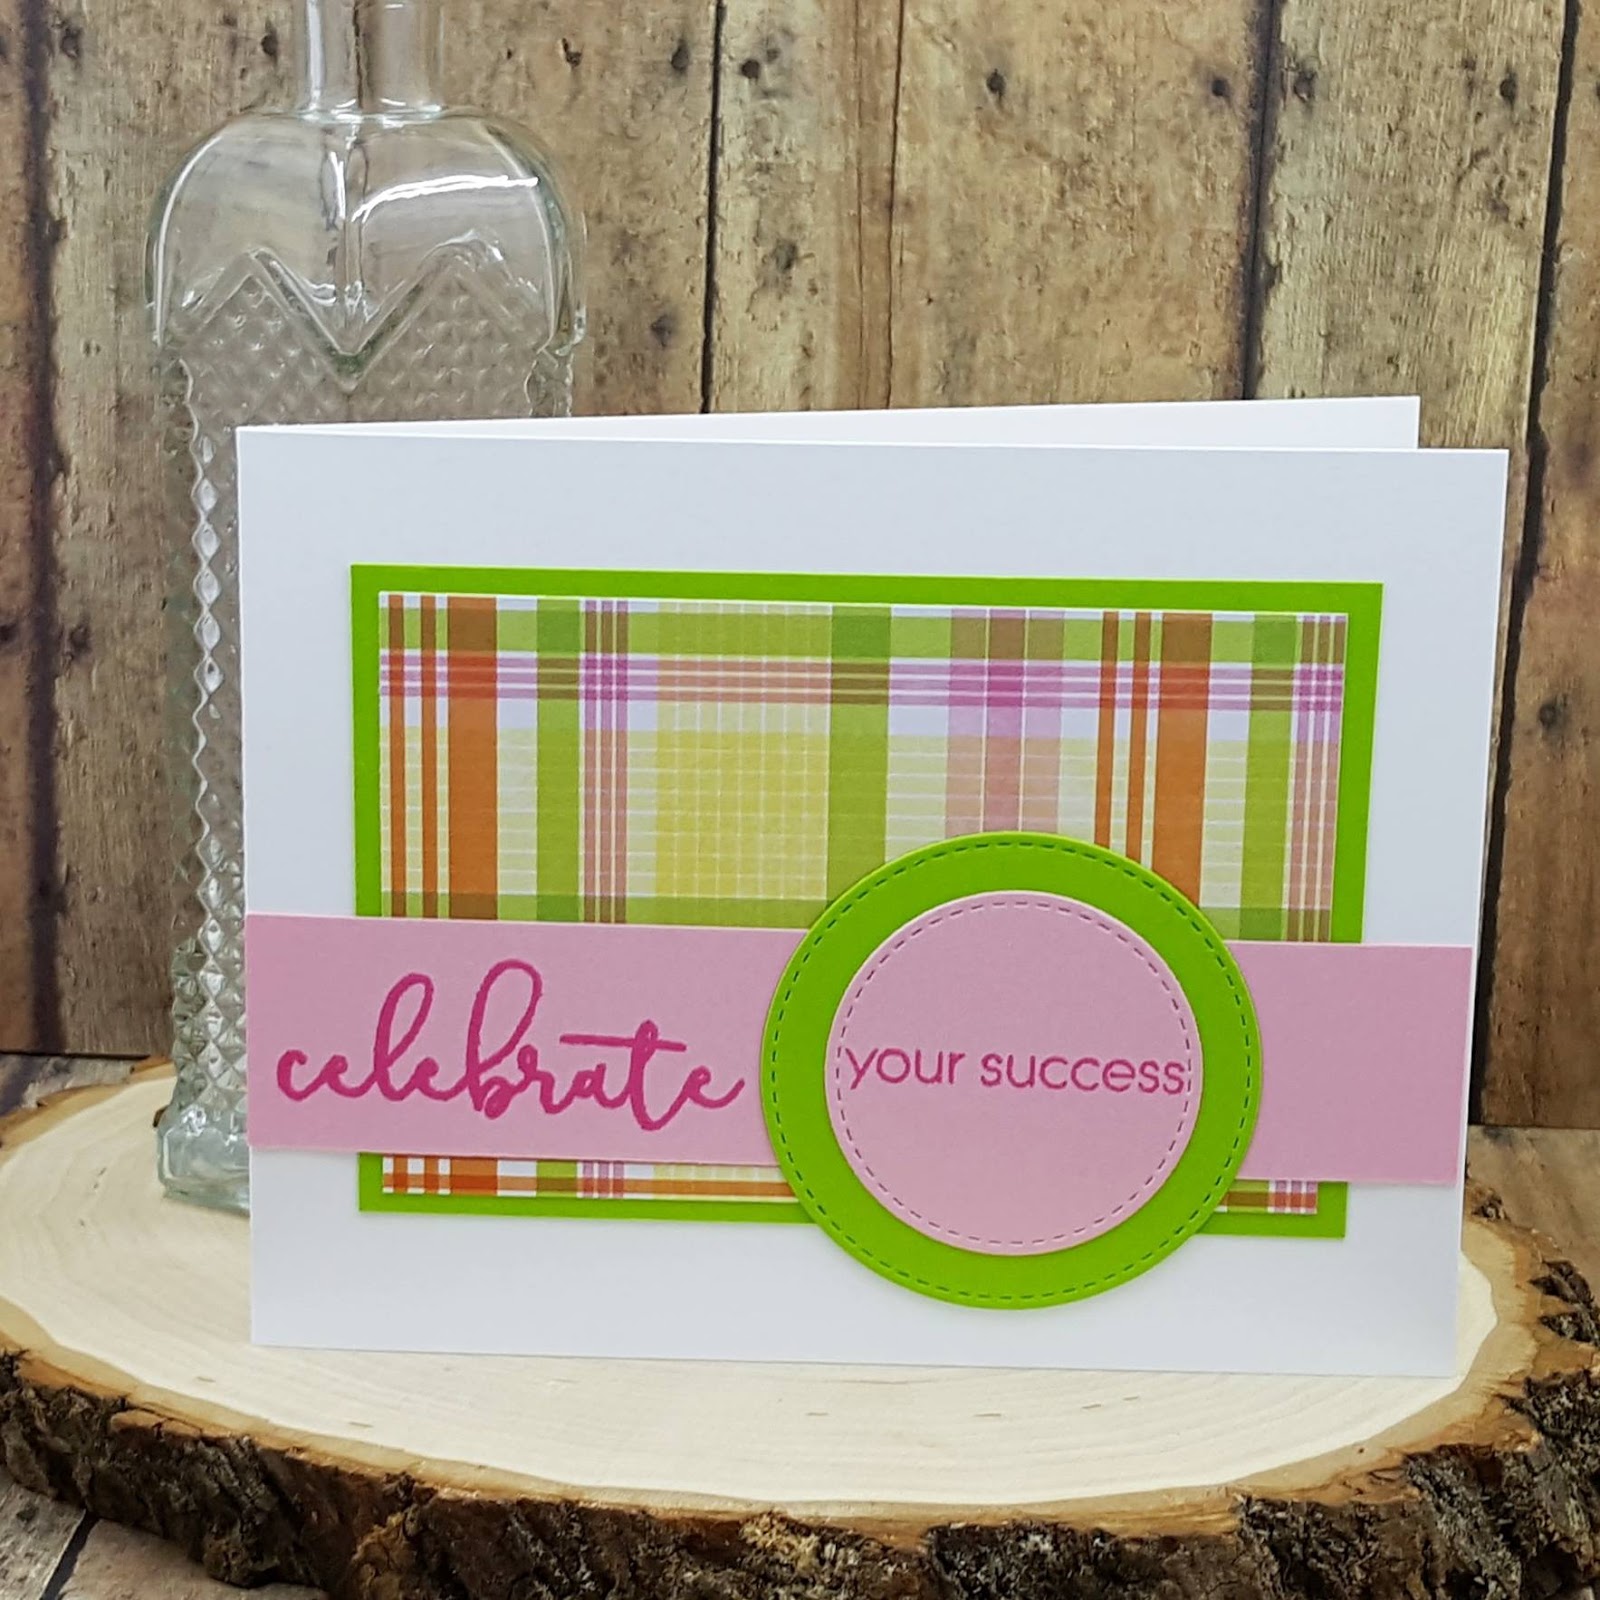
Today I have 10 cards made from ONE piece of pattern paper.  I am a Pinterest addict and will be the first to admit.  I stumbled upon this technique somewhere along the way.  There are so many sketches available on Pinterest.  You will see it called one sheet wonder or one page wonder... both will get you great ideas. 

I found in doing my one sheet wonder that using the sketch measurements on a computer screen as I worked .. worked best for me.  You could also measure out the sketch measurements on the back of your pattern paper and then cut.  Which ever way works best for you.  I really encourage you to try one out.

Here is the sketch I am using.  The link on Pinterest did not lead me to a good link.. so I apologize not being able to Thank the person properly who created this sketch.


I even did a video for YouTube that you can check out here.  Be kind.. I am just learning how to videos.  LOL  Be sure to subscribe and give me a thumbs up!  I'd greatly appreciate any support you all give. 


I absolutely love how these cards turned out.  I never ever do a simple card, but all 10 are very simple with very little embellishments.  This is photo heavy.

Cas-ual Fridays - All About You (from a previously released Stamp of Approval box)

Craftin Desert Divas - Wishful Thoughts & Dies

Concord & 9th - You've Got This

Hero Arts - Kindness

Lawn Fawn - Believe in Yourself

My Favorite Things - Amazing

My Creative Time

So Suzy Stamps

Simon Says Stamp - Uplifting Thoughts

SugarPea Designs - Celebrate

I hope this triggers some creativity in your craftiness.  I'd love to see what you make!
Happy Crafting
~Kara

Sunday, July 17, 2016

Monthly Self Check Reminder!

Hello!  Thank you so much for stopping by
 
Today I want to share a very special card for a blog hop I am participating in.  I do not know of one single person who has not been touched by cancer in some way... Cas-ual Fridays has started a monthly blog hop to remind women to do a monthly self breast exam.  You can read the story on how it began here.  I encourage you to take a few moments to read up on how to do a self exam if you do not know how.  It takes moments to do your self exam and could save your life.  Please remind all of the women in your life to do so.
 
You should have arrived from the blog of Jennifer Ingle.  If you did not or got lost along the way please start back at CAS-ual Fridays Stamps.
 
 
CAS-UAL FRIDAY's  has their own line of stamps and dies mainly for Breast Cancer cards and it is called Calling All Sistahs and 50% of the profits from the sales of the Calling All Sistahs line goes to the National Breast Cancer Foundation, Inc. for research and medical help.  Check out the line here.  Anyone is welcome to participate in the Blog Hop that happens on the 17th of each month. 
 
Here is my card for the hop!


Products used:
 
Cas-ual Fridays Hope Ribbon
Cas-ual Fridays YOU (from a previous Stamp of Approval Box)
Craftin Desert Divas Fancy Frames
Brutus Monroe Alabaster Embossing Powder
 
I first took the Hope Ribbon stamp set and the word HOPE.  On pink card stock I embossed with Brutus Monroe Alabaster powder in rows. I wanted the HOPE to be staggered .. I do have to say I am one of the worst straight line people in the world.. So I did take a ruler and make a cheater line so it would be straight.  After I had all of the hope stamped out and embossed.. I took two tiny hearts from a set called YOU (from a previously released Stamp of Approval set) and stamped in random places using So Suzy Ink Bites in Watermelon and Thistle Thicket.  I then used the largest die in the Craftin Desert Divas Fancy Frames set.
 
For my top layer, I took again the Fancy Frames die and I only wanted a tiny portion for a layer.  I then stamped and embossed hope is stronger than fear .. I added a few more hearts from the YOU stamp set.  I took out my twine (I am trying to use this more) and after wrapping a few times I saw it looked perfect in the grooves from the die.  It worked perfect.  I then added a few flat back pearls and with scor tape I adhered that to my main card .
 
I added some foam tape to the main panel and ran the watermelon ink bite from So Suzy around the outside edge.   My card turned out amazing and I can't wait for this to make someone smile who is going through this terrible disease..
 
Thank you so much for stopping by.. Be sure to comment for a chance to win a gift certificate and keep on hopping!
 
Your next stop on the Calling All Sistahs Blog Hop is Kelly Griglione
 

 **There will be a $15 Gift Certificate given to 3 people that comment along the hop.**   Comments close on July 19th at midnight EST.
 

You can learn all about how Calling All Sistahs got started here.

If you are a facebooker, we'd love for you to join us in our Facebook group! Click here to join
This group is for hop stops, hoppers, and anyone interested in Calling All Sistahs :)
 
If you should get lost along the way please go back to the CAS-ual Fridays Calling All Sistahs Blog Hop.  
 
So remember we have all come together for this blog hop to encourage our Sistahs to do their monthly breast self-exams and yearly mammograms!!


Monday, July 11, 2016

A cuppa thanks!

Hello!  Thanks so much for stopping by
 
Today starts a new linky challenge at Craftin Desert Divas.   If you have not entered challenges now is a great time to start!  The theme for the next two weeks is Coffee and can be found here.
 

If you do not have coffee stamps, Craftin Desert Divas has digital images you can print from home and color! 
 
For my card I started off by taking out the Fancy Frames die set.  This set and the flag banner set are staples in my crafting .. I use them on so many projects.. I highly recommend either of these (or both if you can).  I knew I wanted a brown look.. I guess brown and coffee go together.  I cut two panels from the Fancy Frames.  The largest panel I embossed with a coffee folder.  I set that aside and with the next panel I heat embossed using the Got Coffee Stamp set.   Embossing powder used was from Lindy's Stamp Gang called Café au Lait.  The photo does not capture the shimmer and shine from this powder, but not only does it accent your image .. it leaves a gorgeous shimmer to the entire piece. 
 
I then cut from the Flag Banner die set my favorite flag of all.  This adds so much dimension to your project.. I stamped and embossed A cuppa thanks with the same embossing powder from Lindy's Stamp Gang.
 
To assemble my card I used scor tape to adhere my largest panel.  I love scor tape because it is super secure and when I emboss I feel like there is so much not touching the paper.. anyways the scor tape is fabulous and strong!
 
Then with my next panel I used foam tape to raise this portion.  Adding my flag banner I actually raised this with tiny pieces of foam tape as well.   Adding one tiny bow with twine makes it a super cute card!
 
Thanks so much for stopping by.  I hope that you will link up your card to join in the fun at the Craftin Desert Divas blog


Saturday, July 2, 2016

Independence Day and Happy Birthday

Hello!  Thanks so much for stopping by. Kara here from Create By Kara
 
I am obsessing with flowers lately and the great part is with Craftin Desert Divas stamp sets.. you can purchase the SVG files to go along with the stamp set! 
 
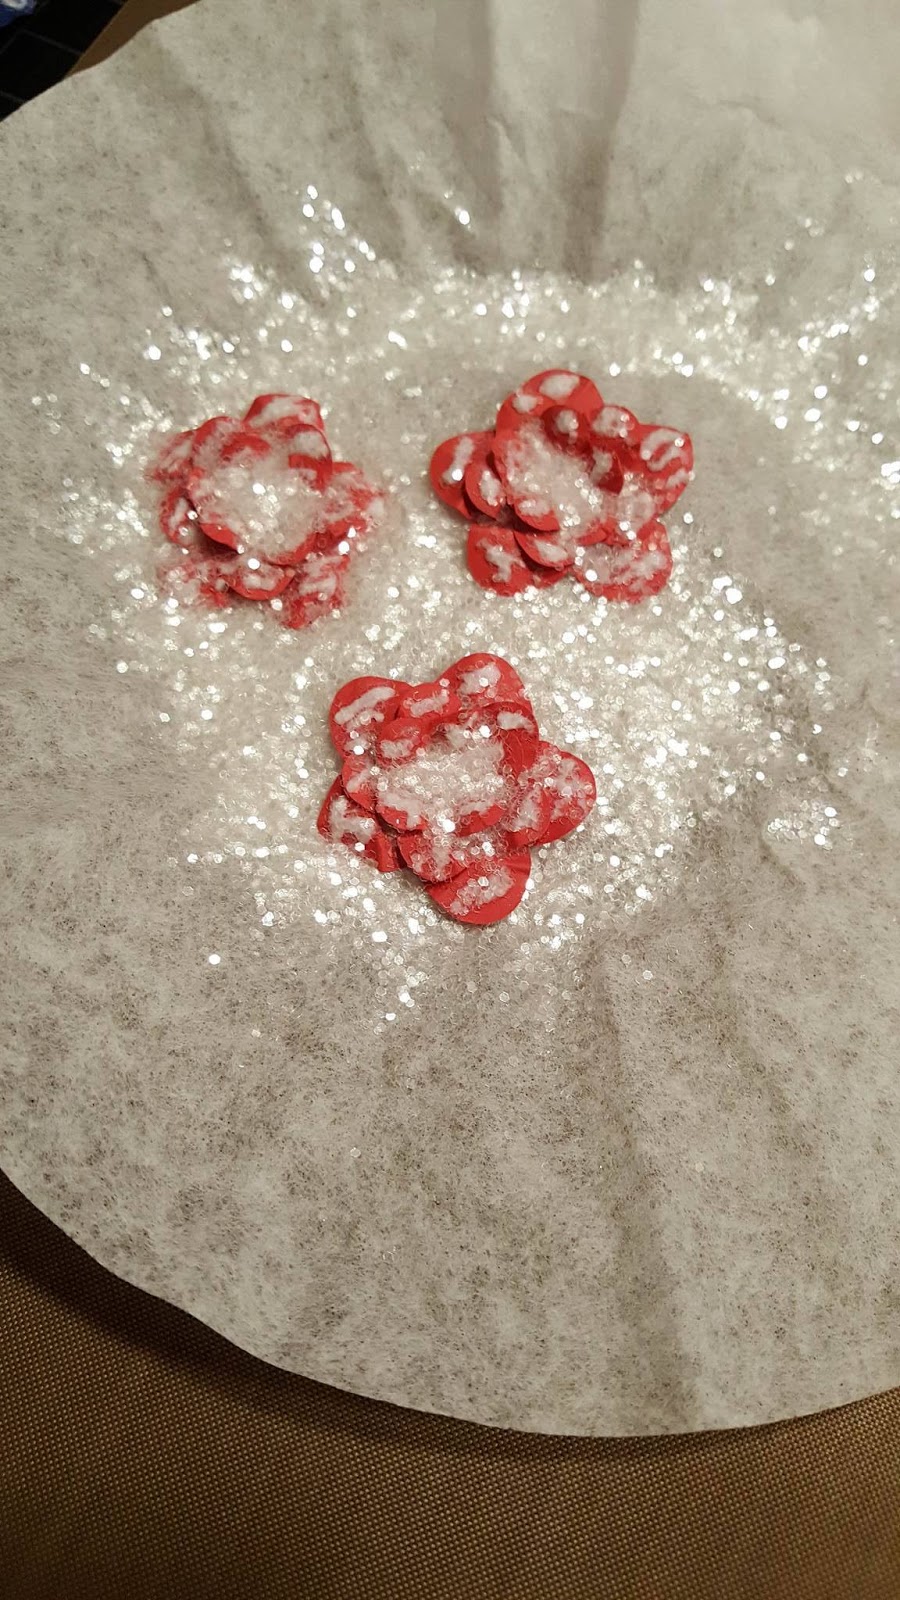
I took the SVG file from Flowers in Bloom and uploaded the file to Cricut Design Space.  The SVG file can be found here.  I made a few different sizes and knew I'd need red and blue (why I didn't make white.. I do not know LOL).  I cut these SVG flowers and then shaped them.  I knew they needed a little pizzazz so I dabbed a bit of glue on the petals and used clear glitter to give them a shine.  The center I knew I wanted white so I got out some fancy glitter and put that on as well.   I then glued the flowers all together.


I then colored my digi Bear with Flower with spectrum noir pens.  I knew this wasn't meant to be a red, white and blue bear, but I turned her into one!  Once I was finished coloring I began to assemble the flowers and bear to the card.  I used Celebrate Freedom with embossing powder to celebrate the 4th of July and Freedom.
 
I used double sided foam to raise the bear and the 2 flowers that would 'prop' my card up.


Craftin Desert Divas products used:


The next card I'd like to show is a pretty simple card.  I used Wishful Thoughts stamp set.  I took Wish you and then added the happiest birthday.  I placed this on a cut out from Crazy Stitched Frame Dies and embossed in white.  Previously I had taken white card stock and flicked paint (I did a ton of these at one time).  I cut the largest frame from the Crazy Stitched Frames and made that my next layer.  I took some twine and wrapped it around the flicked paint layer.   I then used the Picture Frame Die for my last die cut frame. 
 
I layered two last layers with white and green. 
 
Craftin Desert Divas products used:


Happy Crafting!
~Kara

Be sure to stop by the Craftin Desert Divas Blog daily for inspiration! 


Saturday, June 25, 2016

Be the Reason someone smiles

Hello!  Thanks for stopping by
 
New week calls for a new challenge at The Color Throwdown blog!  This week the colors were so amazing that I can't stop looking at them.   Here is the swatch to work with.
 
 
I am loving the layered look lately.  It seems all of my cards end up with numerous beautiful layers. I first started off with my card base.  It is 5 x 6.5 and I purchase these at Michaels when on sale. I ended up trimming it slightly which I normally do not do.
 
I started out with a 4 x 5.5 white piece of card stock and took the brand new ink from So Suzy Stamps called Wild Watermelon.. and oh is this gorgeous.  I know this will be my go to pink from here on out..   I took my ink blending tool from Tim Holtz and placed the Wild Watermelon down.  I die cut in yellow the brand new stacked stars from Simon Says Stamp.  I left some of the stars intact ..  I ended up cutting down this piece of cardstock as my stars didn't take up as much space as I thought.
 
I then started my layers.. I used the Scalloped square from SugarPea Designs.  Orignally this was from a Stamp of Approval box, but can now be purchased outside of the box.  The next layer is from Craftin Desert Divas Fancy Frames.   The next layer is the Picture Frame die from Craftin Desert Divas.  The pink layer is a regular old cut and I embossed this layer.  Finally one last white square.. I took my Wild Watermelon and drug it around the edges of this piece to make it kinda pop away from the white card base.
 
I then took the Flag Banners from Craftin Desert Divas and used the brand new set from Simon Says Stamp (inspired by Jennifer McGuire) Uplifting Thoughts.  I embossed this with Alabaster from Brutus Monroe.
 
It needed something else.. so I rummaged through my ribbon and found pink.. and had some twine in the mess, so I added that as well. 
 
This card turned out so incredibly gorgeous.  The colors together are stunning.. Be sure to  join in the Color Throwdown Challenge weekly!


Monday, June 20, 2016

Red, White and Blue

Hello!  Thanks so much for stopping by.  Welcome to week 1 of the Red, White and Blue linky challenge at Craftin Desert Divas.
 
Red, White and Blue!!  Home of the Brave is what those colors represent to me.  I started off by printing the July Bear digital image from the Craftin Desert Divas store.  I then colored with Spectrum Noir markers and cut with my Brother Scan N Cut. 
 
With the party die set, I cut two balloons in patriotic paper I purchased at Walmart.    I used the Flag Banner die set to stop and emboss Home of the Brave (from Celebrate Freedom).  These banner dies have become a staple in my crafting.  To create some layers in the card I used the brand new Crazy Stitched Frames, Picture Frame and Stitched Circles.
 
Be sure to link up your Red, White and blue card here at Craftin Desert Divas .


Craftin Desert Divas products used:

July digi Bear: http://craftindesertdivas.com/july-bear-digital-stamp/
Picture Frame:
http://craftindesertdivas.com/picture-frame-die/...
Flag Banner: http://craftindesertdivas.com/flag-banner-dies/
Stitched Circles: http://craftindesertdivas.com/stitched-in-circle-dies/
Celebrate Freedom: http://craftindesertdivas.com/celebrate-freedom/
Party Dies: http://craftindesertdivas.com/party-dies/
Crazy Stitched Frames: http://craftindesertdivas.com/crazy-stitched-frame-dies/


Saturday, June 18, 2016

Thinking of you

Hello!  Thanks so much for stopping by
 
Today I'd love to show off a card using the brand new Flower Power from The Joy Collections, found at Brutus Monroe.  This set has endless possibilites..
 
I used Altenew ink and layered my flowers.  These cute little heart flowers are adorable!!
 
I then took from the Flag Banner set at Craftin Desert Divas and stamped Thinking if you from the Flower Power set. 
 
It was a super simple and quick card.  Highly recommend this Flower Power stamp set.


Friday, June 17, 2016

Last drop...

Hello!  Thanks so much for stopping by
 
Be sure to stop by Craftin Desert Divas for coffee digi stamps! 
 
Today I would like to share a coffee card I made using a digital image from Craftin Desert Divas.  I wanted to stretch my thoughts and use what I had already.. I'm a good one for always needing the new stuff, but I was looking through my stash of digital stamps and low and behold had a bear from winter.  Cocoa Bear.. so I printed him out and colored away.    I knew I'd have to cover up the snowflake so I took out the Got Coffee set (physical stamps) and a heart punch.  I stamped the heart onto the heart punch in white and then I distressed the heart with Grape distress ink.. I then added some foam dots and over the snowflake it went.


The Fancy Frames die set is a staple in my collection.. I use these dies in many projects.   I also used the Picture Frame die for another layer in the card.  To add my bear I used Stitched Circles and then foam tape to raise the bear a bit. 
 
To finish it off the sentiment (from Got Coffee) I heat embossed in white on the Flag Banner Die set.  I'm in love with this banner set.. A must have in your collection.  I never ever throw packaging.. bows.. etc away.  The purple bow is from the packaging of stamps at Craftin Desert Divas!
 
It is super simple to use digital stamps in your projects.  I have a Brother Laser MFC-9340 printer and print on either Brutus Monroe alabaster paper or Spectrum Noir paper.  I use Sprectrum Noir makers to color.  If you have any issues.. Heat set the ink before coloring.   I use the Brother Scan N Cut to 'fussy cut' all of my images.   You can do a close cut.. or I chose to offset my image a smidge..


Craftin Desert Divas products used:
Coffee digi products:  http://craftindesertdivas.com/products.php?product=Coffee-Friends-Digital-Stamp  *** be sure to grab the coffee freebie digi for a limited time only **
 
 
Thanks so much for stopping by
Happy Crafting


Sunday, May 22, 2016

Color Throwdown Challenge #ctd393

Hello!  Thanks so much for stopping by
 
This week I participated in the Color Throwdown Challenge #ctd393.  These colors together are so gorgeous!
 
Here are the colors to use. 


I used a stamp set from Skipping Stones called Beautiful Botanicals.  Also using the brand new flag banner dies from Craftin Desert Divas as well as the Fancy Frames Dies..  Adding some pearls made the finishing touch.


I hope that you will participate as it is a new challenge each week here !  It's fun and who isn't up for a challenge.  

Friday, May 13, 2016

Ladybug Girl

Hello!   Thanks so much for stopping by
 
It's ladybug season here in PA!  This little cutie is called Ladybug Girl from Craftin Desert Divas.  She is a digi stamp that is super fun to color!   Don't let digi stamps intimidate you..   I'd start with what colors best with the ink type you use in the printer.  I see many people wanting to use digi stamps, but do not know how.  I have a Brother laser printer and most of time use Spectrum Noir to color.  Just do a bit of research and dive in.  Craftin Desert Divas almost regularly has a freebie.. so try it out!
 
First I printed out the Digi Stamp Ladybug Girl and colored with Spectrum Noir markers.  After I had her all colored in, I cut with my Brother Scan N Cut.  I'll forever say that machine is a life saver.. I'm not a great scissor user so this does it for you!
 
Here are the Spectrum Noir markers I used for her hair and skin.  I found this combo on Pinterest and love how it turned out.


I then found paper I'd be using for my card.  I may or may not have a paper hoarding issue.. And then when it comes time to use it.... I cringe because what if.. LOL  tell me I'm not alone..
 
I cut a white strip and took out some twine and became to wrap  to the left.  I then used the Stitched Circles from Craftin Desert Divas and did several layers. 
 
Using the Wishful thoughts dies.. I cut the word BIG out of glitter paper.  That tiny dot for the I is a pain to keep track of.. I think I cut 3 separate dots lol. I took a small tag from the Pocket Pieces Hi die set and HUGS from Wishful Thoughts ... embossed that in Alabaster from Brutus Monroe.
 
I popped up the Ladybug girl with foam dots.. and then started to place the black stitched look with my black gelly roll pen.. the first time it started to leak.. I should have stopped, but I kept going and it turned bad..   I then had to cut hearts from the Heart of Heart die to place over the mistakes..


This is a super cute card!  Who doesn't need a BIG HUG with a cutie pie LadyBug?? 
 
 
CDD products used:
Ladybug Girl: http://craftindesertdivas.com/ladybug-girl-digital-stamp/
Stitched Circles: http://craftindesertdivas.com/stitched-in-circle-dies/
Wishful Thoughts word Dies: http://craftindesertdivas.com/wishful-thought-word-dies/
Wishful Thoughts: http://craftindesertdivas.com/wishful-thoughts/
Pocket Pieces Hi dies: http://craftindesertdivas.com/pocket-pieces-hi-dies/
Heart of Heart dies: http://craftindesertdivas.com/heart-of-heart-dies/