Showing posts with label card making hobby. Show all posts

Saturday, April 15, 2017

Rainbow of Thanks

Hello!  Thanks so much for stopping by
 
Today I am sharing a card I made for the Cas-ual Fridays Stamps challenge, Rainbows. 
 
 
I had a general idea of how I wanted this card to come together.  I first took the 4 petal Fri-die and colored with a dauber, the edges of each in Catherine Pooler inks.  I took my pinky and with the color Tierra, dabbed the center.  I then glued each flower together.  I used prills for the center of each flower to give it some interest.
 
I then took Thank you from So Pretty stamp set and stamped this on the bottom right corner.  I used my MISTI because I wanted a dark impression and the MISTI allows you to stamp as many times as you'd like in the same spot.
 
I'd like to say this is a pretty CAS card.  For me, this is a very simple 'almost' one layer card.  The outcome is just what I had in mind.
 
 
This card is entered into the Rainbow challenge at Cas-ual Fridays Stamps blog here.
 
Cas-ual Fridays products used:
So Pretty - Stamp set
4 Petals - Fri-Die


Tuesday, February 21, 2017

Be what you want to BE

Hello!  Thanks so much for stopping by
 
Have you ever tried mirror image stamping??  I had not ... until I made this card for the So Suzy Stamp Mirror Image event.   I can see this will be a technique I will use more in the future... You definitely need a good silhouette stamp or solid image for this to work well. 
 
Products used from So Suzy Stamps:
 
I first took my sun stencil and made my background.  I blended out the inks to make a more vibrant look using Tiki Torch and Orange Twist from Catherine Pooler.
 
I then held my breath and had Justine Hovey's YouTube video playing while I gave it a try.  Believe it or not, this was my first try.  After I did it, I said geez.. why didn't I practice on a scrap piece of paper first.  Anyways, thank goodness it turned out great the first try.
 
I love this technique and I'm so glad So Suzy Stamps hosted the challenge.  I love to try to things and this will be one I keep in my think tank.
 
 
This card is entered into the challenge:


Wednesday, December 28, 2016

Happy New Year!

Hello!  Thanks so much for stopping by
 
Where oh where did the Holiday season go??  I got so far behind with my wreath and ornament orders that NO Christmas cards got sent out!!  I had all intentions in making and then I quickly realized it was December 25th and that was not going to happen.  Into my stamp stash I went. 
 
I have a love for fancy fonts and so I found the Wintery Script from Lawn Fawn and knew this would be my card.  I then when to Pinterest for a bit of inspiration and saw circles and twine and all kinds of goodies.. So I got out the Circle die plate from Queen & Company.  I knew this would be it!
 
I first took the die from Queen & Company and cut 25 with my Vagabond 2.  It was super simple and now I have a big stash of circles from the negative. 
 
I then took the Happy New Year stamp and my Mini MISTI (which is the most incredible tool)  and stamped in groups of 5 with Brutus Monroe embossing ink and embossed with Brutus Monroe Gilded.  Once I complete 25 in this process, I started my layering.  I found 3 different golds that I wanted to use.  I adhered the layered piece and then to my card base.
 
I used my Cricut for the inside.  I did not want to handwrite on all 25, so I did a simple New Years message on the inside and let my Cricut do the writing for me.
 
I then added a few stars from a pack I purchased at Hobby Lobby.  After a while, I got to thinking a stamped star would be easier.. So I got out the Papertrey Ink stamp set Star Scribbles and stamped a few stars. 
 
I love the different looks each card holds.  I was bumming that I did not get to send out Christmas cards, but it turned out for the better.. these are SUPER cute and I know the recipients will be surprised to receive the card.
 
 
This card is entered into the Simon Says Wednesday challenge:  Anything Goes


Tuesday, November 1, 2016

Happy Birthday

Hello!  Thank you so much for stopping by
 
I created a card today for the Lawn Fawn Challenge, over at the Simon Says Stamp Wednesday Challenge.
 
Lawn Fawn Products used:
Put a Bow on It
 Let's Bokeh
Scripty Big Words
Lawn Fawn Perfectly Plaid paper pack
 
 
I entered this into the Wednesday Challenge at Simon Says Stamp


Monday, October 24, 2016

Pull yourself together!

Hello!  Thanks so much for stopping by
 
 
When I have ideas for a card, generally I have an idea of who it will be for.   I need to definitely get better at mailing cards, but when I had the idea for this card... I just knew it would be going to one of my girlfriends.  I wouldn't be surprised if it ends up on her desk at work.. She has an amazing sense of humor.
 
I started with the Sizzix Elegant Stand ups for my base.  These give such a gorgeous base (and I may have many of Stephanie's dies).  I also cut the strip along the bottom while cutting the base.  I later added pearls along that strip to dress it up.
 
I then took the stamp Pour Yourself a Drink from So Suzy Stamps and heat embossed in Brutus Monroe gold.  Added some foam dots to raise the panel and a few flat back pearls.
 
Finally, I tied a bow and glued it down.. and a gorgeous stand up card is the end product.
 
 
This card is entered into the Simon Says Stamp Wednesday Challenge:  Link
 
 
Affiliate links may be used in my blog.  This does not cost you anything to purchase. 


Sunday, October 23, 2016

Be careful what you wish for....

Hello!  Thank you so much for stopping by
 
About a month ago, Suzy from So Suzy Stamps asked if I'd be interested in being a Snark Ambassador... and I said YES!  Through out the months I'll be making cards to show Snarky stamps from her line.  You can check out her line of Snarky here 
 
I started to make my card and quickly that turned into 2 cards in different colors and shapes. 
 
I started off stamping the Spray stamps in random pattern and colors.  I came up with two combo of colors that I just love.  I used all So Suzy Ink Bites for my cards. 
 
My first card, I knew what I wanted in my head.  I used a 5.5 x 5.5 card base and cut a panel from white card stock.  I then took the inside out circle die from My Favorite things and centered to cut.  I stamped my sentiment and placed foam tape on the back of my panel to make it pop.
 
 
My 2nd card was pretty basic.  I loved the sentiment and wanted a different color card.  I used the inside out rectangle die from My Favorite things and foam tape to pop that up.  It was a super simple and quick card.


So Suzy Stamps products used:
 
Spray (regular and Mini:  here
Be Careful What you wish for:  here
Ink Bites:  here


Affiliate links are used in this blog.  This does not cost you extra.  It let me keep blogging and sharing. 


Thursday, September 22, 2016

Happy 1st Birthday Bryndle

Hello!  Thank you so much for stopping by.  Today I am showcasing a card made with My Favorite Things product.  I am entering this into the MFT Stamps Super Star card contest. 
 
When I first saw the card kit Sensational Stitched Flowers card kit.. I KNEW I had to have it.. regardless of how many flowers I already had in my stash.  I had ideas flowing in my mind from the time I hit send. 
 
I received a 1st birthday party invite and on the front was my precious sweet cousins baby.  She has pearls draped on her and all pink.  I just knew the moment I saw the invite .. this is what my card would be using the card kit.
 
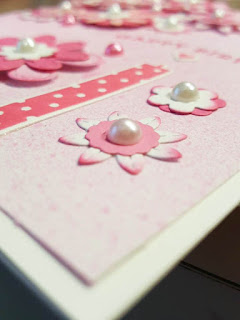
I got all of my supplies out and started cutting flowers.  I cut several different shades of pink as well as white.  I left the entire flower die together and just cut repeatedly.  I ended up with TONS of flowers!


I then took my white flowers and with momento rosebud ink and a dauber I edged many of the flowers as well as coloring a bit on them with the dauber.  I probably could have done my entire card in the white with the pink edges..
 
I then started to piece the flowers together using glue. 


I also used Make a Wish die and stamp set to make one single candle for Bryndle's 1st bday. 
 
I then added finishing touches to the flowers with flat back pearls and raised some flowers for dimension. 


I could not be happier with the outcome of this card.  This is entered into the Superstar card contest.   I'm obsessed with MFT Stamps and love every single thing released.. Check them out if you haven't yet!


Saturday, August 27, 2016

Thankful for you

Hello!  Thanks so much for stopping by
 
Today I want to share a super quick card I created using a digital file from Craftin Desert Divas called Delightful Daisy.  I used Zig Clean Color Markers on Bristol watercolor paper to achieve the look I was going for.

I print my images using a Brother laser printer.  I have found this printer is great with all mediums and paper. 


I cut two colors of greens for my grass using the Landscape die set.  I then took the Stitched Scallop die to make a cloud in the sky.  To cut my digital flower I used the Brother Scan N Cut.  I never was good with scissors, so this machine for me was a life saver. 

I then pieces it all together for this quick card and stamped Thankful for you from the Thankful Squeaks stamp set.  Added a few sequins and a few dots with a white gel pen..  and complete! 


CDD Products used:
Delightful Daisy - http://craftindesertdivas.com/delightful-daisy-digital-stamp/
Landscape dies - http://craftindesertdivas.com/outdoor-landscape-dies/
Stitched Scallop Dies - http://craftindesertdivas.com/stitched-scallop-dies/
Thankful Squeaks - http://craftindesertdivas.com/thankful-squeaks/
Pastel Paradise sequins -   http://craftindesertdivas.com/pastel-paradise-sequins/


Thursday, July 21, 2016

Pond Scene using Zig markers

Hello!  Thanks so much for stopping by.  Today I'd like to showcase the Spring Pond die. from Die-Versions.


I simply took Strathmore Bristol Watercolor (smooth surface) paper and cut my die with the Vagabond 2.    I then used Zig Clean Brush Markers and a Water Brush to apply the color.  This is a super simple card, but I have a family member who loves the outdoors and flowers so she will LOVE it!
 
For the background, I took another piece of watercolor paper and with blues made a water and sky look.  I traced around the die cut with a pencil so that I just placed the blue where I needed to.  After assembling the card, I opted for an orange background so it would make the dragonfly pop a bit.


Thanks so much for stopping by.  When shopping at Die-Versions be sure to use the code kara15 to receive 15% off from your order.  This can not be combine with any other sales or promotions. 

Tuesday, July 19, 2016

Baby Girl Congratulations!

Hello!  Thanks so much for stopping by.  Today I will be showcasing the Baby Border die available here.


The Baby Border die has so many possibilities.  I created a Congratulations card for a Baby girl.  It is a simple card, but girlie!  I even created a video to show how I did the process.  I am a beginner on videos.. but I thought this one would be a great way to start.  You can find the video here on YouTube.
 
Products used:
Die-Versions - baby border die
Joy Clair - oh Baby
So Suzy Stamps - Ink bites
Lindy's Stamp Gang - Flat Fabio
 
 
Thanks so much for stopping by.  When shopping at Die-Versions, be sure to use kara15 to save 15% from your order.  This cannot be combine with any other sales or promotions. 
 
Stop by daily to see tons of inspiration from the gals here at Die-Versions here.

Sunday, July 3, 2016

Grateful

Hello!  Thanks so much for stopping by
 
I have a wonderful card to show today!  Simple and easy (which I normally don't think to do).  I love to enter the Color Throwdown Challenge weekly when I can.. So I decided to do both my first MFT sketch and color throwdown in one card.
 
Here is the sketch and color chart I had to work with.


I used My Favorite Things:
Blueprints 24
Grateful 4 U
 
The sketch challenge fit right into the blueprints I happen to have (#24).  I simply used the blueprint to create my entire card.  I decided to use the word grateful for the main part of my card.  I used brown fun foam for both grateful and the stars (which are a part of the blueprints 24).
 
I then stamped to have you in my life at the bottom to complete the card.
 
The Color Throwdown Challenge can be found here
My Favorite Things challenges can be found here  
 
 
Happy Crafting!
~Kara


Tuesday, June 28, 2016

Just Believe

Hello! Thanks for stopping by today . I'd love to showcase from the Whispers collection .. Dragonfly at Die-Versions
 
 
I started out by die cutting the Dragonfly in gold foil paper.  It is a very thick paper and the die has some intricate cuts so I placed a piece of cardstock folded under my plate for some extra thickness.  It cut perfectly the first time.  I just received my Vagabond 2, so I wasn't sure how thick I would need.
 
My card is 4 x 5.5 in size and I played with my gelatos for this card... Ok, well my purple gelato!  I used watercolor paper and gesso to place a layer over the paper (let this dry).  I then scribbled some gelato and with my spray bottle spritzed and moved the gelato until I was happy with it.  I wanted this card to be simple .. but let me tell you.. it looks stunning in person.
 
I wanted the dragonfly to really be raised, so I placed two layers of adhesive foam .. it was so high that you could see the foam.  I took out  a gold marker and colored it so it would blend in. You can leave the wings as is or I bent them slightly giving them some curve.


I then stamped my sentiment (from My Creative Time)  and embossed in Brutus Monroe gold.  Placed the dragon fly on the card and added a few rhinestone embellishments for the final touch.


Thanks so much for stopping by!  When shopping at Die-Versions be sure to use the code kara15 to save 15% from your order.   This can not be combine with any other sales or promotions.
 
Happy Crafting!
Kara


Friday, June 17, 2016

Last drop...

Hello!  Thanks so much for stopping by
 
Be sure to stop by Craftin Desert Divas for coffee digi stamps! 
 
Today I would like to share a coffee card I made using a digital image from Craftin Desert Divas.  I wanted to stretch my thoughts and use what I had already.. I'm a good one for always needing the new stuff, but I was looking through my stash of digital stamps and low and behold had a bear from winter.  Cocoa Bear.. so I printed him out and colored away.    I knew I'd have to cover up the snowflake so I took out the Got Coffee set (physical stamps) and a heart punch.  I stamped the heart onto the heart punch in white and then I distressed the heart with Grape distress ink.. I then added some foam dots and over the snowflake it went.


The Fancy Frames die set is a staple in my collection.. I use these dies in many projects.   I also used the Picture Frame die for another layer in the card.  To add my bear I used Stitched Circles and then foam tape to raise the bear a bit. 
 
To finish it off the sentiment (from Got Coffee) I heat embossed in white on the Flag Banner Die set.  I'm in love with this banner set.. A must have in your collection.  I never ever throw packaging.. bows.. etc away.  The purple bow is from the packaging of stamps at Craftin Desert Divas!
 
It is super simple to use digital stamps in your projects.  I have a Brother Laser MFC-9340 printer and print on either Brutus Monroe alabaster paper or Spectrum Noir paper.  I use Sprectrum Noir makers to color.  If you have any issues.. Heat set the ink before coloring.   I use the Brother Scan N Cut to 'fussy cut' all of my images.   You can do a close cut.. or I chose to offset my image a smidge..


Craftin Desert Divas products used:
Coffee digi products:  http://craftindesertdivas.com/products.php?product=Coffee-Friends-Digital-Stamp  *** be sure to grab the coffee freebie digi for a limited time only **
 
 
Thanks so much for stopping by
Happy Crafting


Thursday, June 2, 2016

Prayers

Hello!  Thanks so much for stopping by
 
Today I've love to show you a snippet of a card box I am creating for a gift. 
 
I used Concord & 9th 'You are Enough' and Simon Says Stamp 'Prayers' stamp sets.  To make the process so easy I highly recommend MISTI.. This tool will make your life so easy to create cards.. especially in quantities..  I then added some tiny rhinestones.  I had matching colors for all except the blue.  I took my spectrum noir pens and made my own color using a clear rhinestone.
 
I used Altenew ink for my layering stamps.  I love the ink as the guess work for what colors go well together when layering is out..


I wanted to use my gorgeous pots of flowers for props and while it is pretty, it is tough to have them perfect for a photo opp. 


I hope this has inspired you to be crafty! 
Happy crafting!


Thursday, May 19, 2016

Die-Versions, Joy Clair and DL.ART CELEBRATIONS blog hop

We here at Die-Versions have collaborated with two awesome companies:  Joy Clair Stamps and DL.ART  to come up with a fun and festive Celebration Blog Hop. We want to showcase how well our three companies products work together.  Die-Versions makes very intricate and lovely dies; Joy Clair makes high quality clear stamps; and DL.ART makes gorgeous rayon hand dyed crinkle ribbon and also carries bakers twine and other hand crafted seasonal supplies.

The Celebration Blog Hop will take place on Wednesday, May 18th, Thursday, May 19th and Friday, May 20th.  Over the three days all Design Team Members will be sharing with you projects they have made for all the many upcoming Celebrations that come around this time of year, ie....Weddings, Baby Showers, Baby Births, Graduations, Father's Day, and of course Birthdays!  All Design Team Members will be using supplies from all three companies to make their projects so you can see for yourself how lovely these products work together and how dies, stamps and ribbons are the perfect combination!!

There will be prizes for those who comment on all the blogs over the three days and who become followers of all the blogs. Die-Versions is giving away a $50.00 Gift Certificate to the Die-Versions store. Joy Clair is giving away 3 $25.00 Gift Certificates to the Joy Clair store, one each day  and DL.ART is giving away a $10.00 Gift Code to the DL.ART store to one lucky winner!!  The prizes will be announced on all three of the companies  Die-VersionsJoy Clair and DL.ART blogs on Sunday, May 22nd.

DL.ART is running a 3 day Special during the Blog Hop for all of the Design Team Followers ~ 12% off your entire order at DL.ART by using code:  DJDHOPS this code will only be valid on the 3 days of the Celebration Blog Hop.
 
You should have come here from Kathy Ota's blog, if not, then please start at the beginning of the at Die-Versions Blog.   The entire list of Designers for the entire Celebration Blog Hop is listed on the Die-Versions Blog.

I started off by prepping my Baby Girl Bootie.  I used double sided tape when die cutting the bootie so I could make it a sparkly with glitter. 


I then took my stamp set from Joy Clair Oh Baby and combine It's a and Girl to fit in the window of my shaker card.  I placed my frame and drew with a pencil so I knew where my opening was to be.


I then erased all of my pencil marks and placed my frame with foamie (I purchase this in the kids section at my craft store).  It gives the dimension for the shakers to shake.


I then placed the Baby Girl Bootie on the card base and used pink crinkle ribbon from DL.ART for the bootie tie. 

The final product came out so full of cuteness!  I hope that you will take time to visit each of the 3 companies collaborating together.. They all have wonderful items to offer.  Happy Crafting!


 Your next stop on the blog hop is Crystal

 If you should get lost along the way please go back to the Die-Versions Blog and the whole list for each day will be listed there.
I hope you have enjoyed the Celebration Blog Hop!! Be sure to
leave comments on on all the blogs for a chance at winning one of the many
prizes!