Showing posts with label die cut. Show all posts

Thursday, September 22, 2016

Happy 1st Birthday Bryndle

Hello!  Thank you so much for stopping by.  Today I am showcasing a card made with My Favorite Things product.  I am entering this into the MFT Stamps Super Star card contest. 
 
When I first saw the card kit Sensational Stitched Flowers card kit.. I KNEW I had to have it.. regardless of how many flowers I already had in my stash.  I had ideas flowing in my mind from the time I hit send. 
 
I received a 1st birthday party invite and on the front was my precious sweet cousins baby.  She has pearls draped on her and all pink.  I just knew the moment I saw the invite .. this is what my card would be using the card kit.
 
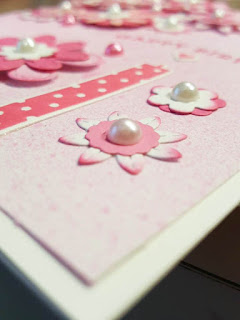
I got all of my supplies out and started cutting flowers.  I cut several different shades of pink as well as white.  I left the entire flower die together and just cut repeatedly.  I ended up with TONS of flowers!


I then took my white flowers and with momento rosebud ink and a dauber I edged many of the flowers as well as coloring a bit on them with the dauber.  I probably could have done my entire card in the white with the pink edges..
 
I then started to piece the flowers together using glue. 


I also used Make a Wish die and stamp set to make one single candle for Bryndle's 1st bday. 
 
I then added finishing touches to the flowers with flat back pearls and raised some flowers for dimension. 


I could not be happier with the outcome of this card.  This is entered into the Superstar card contest.   I'm obsessed with MFT Stamps and love every single thing released.. Check them out if you haven't yet!


Tuesday, August 30, 2016

I'm here for you


Today I'd like to showcase the Nesting Flower die set!  This is a staple in any collection.  There is so much you can do with this die.  I have shown before that you can also make clouds as well.  I do apologize, but this die is currently out of stock, but check out the other nesting dies available here
 
Today I used the die set as flowers.. the way it was intended to be.  I cut multiple layers from different purples and simply glued my flower together. 
 
For my background, I created using distress inks and placed some purple ribbon behind my flowers for added eye candy.

I used the stamp from Cas-ual Fridays - I'm here for you.  For the light purple background I used the background stamp from a stamp of approval box by Catherine Pooler and heat embossed.  This is from the Lovely Notes collection.

This is a super simple card with lots of possibilities..  You could dress it up even more or keep it simple.  Sometimes simple is best.

Have a great day!!
 

Wednesday, April 6, 2016

Love with butterflies

Hello!  Thanks so much for stopping by.  Today I want to showcase the new Love from the Curly Words collection.  I absolutely love this new release from Die-Versions.


I have seen a few cards using the collar fold and of course I wanted to try one.  I assembled my card in a 5.5 x 5.5 fashion.  Most collar fold cards I have seen were to the right side, but I knew I wanted to use my word LOVE in some fashion.  So I decided to do a top fold collar style. I simply cut in about 1.5 inches and folded the edges of the cut line down.  It is helpful to use the point of your corners to make the fold.  I used my scor buddy to get a straight line.   I used the MFT Stamps border dies to make the edges on the folded card.  I had to do a partial for the edges on each side since I only wanted it on the edges.

Butterflies to me.. are a sign of hope and life.. The gorgeous butterflies are all from Crafters Companion, Sara Davies collection (an HSN purchase from Craft Day :) )  Along with the butterfly embossing folder.  This collection is stunning in person! 
 
I cut the Love die from Die-Versions Curly word collection in coordinating purple and adhered it to the top.    I then placed some Tonic Nuvo Crystal drops all over.  I got carried away, but I'm in love with these new drops.  I used some of the embossing folder for the pattern and added several that were not on the folder.
 
I hope this has inspired you to be crafty!  As always, when shopping at Die-Versions be sure to use kara15 for 15% off of your order.  This can not be combine with any other sales or promotions. 
 
 
~Kara


Tuesday, April 5, 2016

Imagine

Hello!  Thanks so much for stopping by
 
Today I want to show off the new So Suzy Stamps April release!!  If you love flowers... you must check out the release here
 
For my card I cut a base 4 x 5.5 inches.  I use the folded cards from Michaels for my actual card, so I try to always have bases cut.  I ended up going to the larger card size for this card in the final stages.
 
I then took two stamps .. Spray and Mini Spray and randomly place using the Ink Bits collection Highland Spring.   After I had enough sprays all over I stamped and embossed the new Imagine stamp (which I absolutely love).   I used Brutus Monroe embossing powder in Alabaster.   I used the stitched rectangle from MFT Stamps and raised this with foam tape (although it may be hard to see in the photo).
 
Then comes the Nuvo Crystal Drops... I need intervention on these.. once you start making dots.. it is tough to stop.  I do need to pre-make these drops because if you mess up on a card/project .. it is too late!!  I did mess up and I also tried to layer purple over white.. Just a word to the wise.. pre-drop these babies on acetate.
 
I then decided to layer some matching cardstock behind my stamped spray. My final card is 5 x 6.5 and gorgeous!!!  I love fun colors and this combo is just that.
 
Thanks so much for stopping by!  I hope this has sparked some creativity
~Kara


Friday, April 1, 2016

MFT Stamps - Thank you

Hello!  Thanks so much for stopping by
 
I'm fairly certain I have a MFT Stamps (My Favorite Things Stamps) issue.. LOL  I love their releases as there is always something .. something you just 'need'.
 
This vertical stars die is from the February release!! I'm not sure why I waited to use it, but it's gorgeous..
 
1.  I took the die and a 5 x 6.5 piece of cardstock and die cut the vertical star twice.  There is also a horizontal star die.. that's why I keep saying vertical.. so you know what I used.
 
2.  I then took the Homespun lines and made a decorative edge to my cardstock.  
 
3.  Using my Brutus Monroe ink (Zest) I used the Tim Holtz ink blending tool and edged the cardstock.
 
4.  I cut my yellow cardstock 5 x 6.5 to lay under the white. 
 
5.  Where my stars met were kind of wonky, so it worked perfect to take a scrap piece of yellow cardstock and stamp with the Brutus Monroe Zest.  I used the star from Count the Stars.  I then took Thank you from Kind Thank you and embossed with Brutus Monroe Alabaster. 
 
6.  I then adhered foam tape for some dimension and placed that right where my starts were wonky.
 
Today was a gorgeous unexpected beautiful weather day (the weatherman was wrong.. I love when he is wrong for the right reason. .LOL)  So this card matched the beautiful bright sunny day!
 
Thanks so much for stopping by! 


Thursday, March 3, 2016

Happy Easter

Hello!  Thanks so much for stopping by. 
 
Creating Spring cards can be so fun!  I love bright fun colors and that is what Spring has to offer.   New life.. new beginnings... which leads into my favorite SUMMER!
 
I started off by taking my card base and using distress inks to make my sky color.  I wasn't incredibly particular about this because I knew I'd have some layers over top.  I then took my Grassy Hills from My Favorite Things and cut two layers.  I used foam dots for my top layer to add that dimension.
 
I took the Nesting Flower die from Die Versions and  die cut blue.  I did two different colors because no two clouds are ever the same.  Once you have the flower cut simply take your scissors and cut in half.  You can do many different sizes clouds with the flowers.  I always try to add dimension to my cards.  The top cloud I added some foam pieces to make it raised .  Don't be afraid to add some dimension!
 
I then cut out the GORGEOUS Happy Easter egg die.  This die cut out is stunning.  I traced the egg on white and cut that with my Brother Scan N Cut for my layer behind the egg.   I was going to add glitter and such to the egg, but truthfully it is so beautiful I decided not to take away from the die cut.
 
I topped of the card with Sunny Skies die from My Favorite Things and added a few flowers from the Painted Thank you from Concord & 9th.
 
I hope this has inspired you to be crafty!   
 
When purchasing from Die-Versions be sure to use kara15 to save 15% on your goodies.  This can not be combine with any other sales or promotions.
 
Have a great day!
~Kara


Wednesday, February 24, 2016

Rainy Day

Hello!  Thanks so much for stopping by
 
I want to share with you an adorable card that I made for the Nature's Wonders Linky Challenge found here with Craftin Desert Divas.  I do hope that you will submit a Nature card or project!  Why not for a chance to win!
 
I first took out my Rain or Shine set (speaking of WIN.. I won this set in a challenge.. so winning is possible).  I stamped what I thought I'd use .. colored in the images using my Spectrum Noir markers.. I colored the images I knew I was using and then I cut on the Brother Scan N Cut my images.  I need to fiddle with this darn machine a bit more.. Some of my cuts are not as clean as they were in the beginning.. Anyways, I cut all of the images.  You will notice there is a the stamped saying When Life Gives You a Rainy Day Play in the puddles.. If you want something to cut on the Scan N Cut, you need to put a closed circle or shape around that image or saying.  Just a little tip!
 
After everything was cut I played around with how I wanted it laid out.  I had an idea of what I wanted.  I just received the new Lawn Fawn paper stack so I flipped through that and there was the perfect colors.. I knew I didn't want tons of paper to show, so I cut 1 1/2 inches and placed them on the outer edge. 
 
For my clouds I used the new Nesting Flower die set from Die-Versions.  Once I had them die cut, I simply cut the flower in half for my clouds. 

I ended up using the When Life Gives you a Rainy Day Play in the puddles stamp on the inside of my card.    I do not tend to stamp the inside of my card, but I thought this looks adorbs in there.

For the photo shoot I used the adorable blue hearts sequins from Craftin Desert Divas to spread around.


Saturday, February 20, 2016

Look for the rainbow

Hello!  Thanks so much for stopping by
 
Today I want to show a water drop stamp set that looks REAL!   In this project, I used Designs by Ryn and My Favorite Things stamps/die.
 
I first started off by water coloring the rainbow.  My water color paper was not the best quality so I will be on the hunt for a better quality paper pad.  I used the $6 water color set I purchased at Michaels.  I love rainbows and I LOVE to use ROY G BIV .. Do you know how hard it is to find Indigo in most color sets??? 
 
After I had my rainbow water colored, I set that aside to dry.  I knew a round about size card I was looking for so I cut down the white strip for my water drops.  I stamped each water drop set in the ROY G BIV color.  These are such an amazing design.. The water drops truly look REAL.  There are some different techniques to use these. Designs by Ryn has a YouTube video on how she explains it.. Definitely look that video up!.  These are the stamps.. They are red rubber and I had to purchase the cling foam to adhere to the back.
 
 
After the water color paper was dry, I took out my dylsusions white spray and took off the sprayer and just flicked some white random.   I then took my stamp set from My Favorite Things when it rains, look for the rainbow (Rainbow Happiness is the set).  I then took RAINBOWS die from Color the Rainbow die set and cut.  I then took my spectrum noir markers and colored each letter to match the rainbow.
 
The white strip with water drops I mounted with foam tape.  I wanted this to be raised for dimension.    I topped off the card with a few sequins to add some flare.
 
I hope you LOVE this card!  It looks ahhhhh-mazing in person. 
Happy Crafting!


Tuesday, November 17, 2015

Snowflakes are winter's butterflies

Hello! Thanks so much for stopping by today!
 
I always say I live in the wrong part of the US.. I like warm and sunny weather.  Here where I reside, we are fortunate that NO accumulation has happened yet.. At least I'm thankful, LOL.
 
When I saw the sentiment stamp from So Suzy Stamps.. Snowflakes are winter's butterflies... I just knew I needed it.   I love butterflies and this is one way to get me through our rough winters..
 
Purple everything!!  That's what I feel.   So of course I went purple.  I used the Snowflake fusion cover plate from My Favorite Things.  I chose a lilac color and to have a contrasting dark purple behind.    I went back and forth as to whether or not glitter was needed to pop out a snowflake.  I tried a few and did not like the outcome, so I used the plain lilac.
 
The tag that I stamped and embossed my sentiment on is from Craftin Desert Diva's Pocket Pieces.  This set is so versatile and be used in so many different ways.  The stitched look is a look I LOVE!
 
I took some twine and wrapped it around that tag to give it a different look.  The snowflakes I used are shiny and give a little flare to the card. 
 
Thanks so much for stopping by!  I hope that if you dislike snow where you live, that you too can see it through different eyes.. Butterflies
 
 
 This card is entered into these challenges.
Sparkle N Sprinkle Creative Challenge
Craftin Desert Diva's linky party


Wednesday, November 4, 2015

Hello Fall!

Hello!  It's Kara here on the blog.  I reside in Western PA and Fall is usually FREEZING cold, but as I write this.. it is a whopping 70 degrees!  So Hello Fall!
 
I took some watercolor paper and sprayed Starbursts from Lindy's Stamp Gang to create the green background.  For the Hello Fall, I used a mixture of sprays ranging from Lindy's Stamp Gang to the Color Bursts from Ken Oliver to pearlescent sprays.
 
I wanted to make a simple, but beautiful card.  I used the Hello Fall Die from Die-Versions to be my heading.  I love this die as there is so many ways you could display this on a card.    I went simple and do I ever love how it turned out!
 
I then took some twine from Annie's Paper Boutique and wrapped around a few times.  I then used the Blessed stamp (Thankful Squeaks set) from Craftin Desert Divas and the tag die from her Pocket Pieces Die set. I attached the Blessed tag to the twine and gave it a little glue to hold in place.
 
The two small leaves came from Simon Says Stamp die set Maple Leaf Corner.  I used the Dylusions orange paint to add some fall color.
 
I adhered the main green background to my Kraft Brown (oohhh I love Kraft Brown, LOL) and just like that the card was complete!  I love love how it turned out.
 
Thanks so much for stopping by! 
 
As always, when purchasing goodies from the Die-Versions shop use kara15 to save 15% (can not use with other sales or discounts)
 
~Kara


Sunday, October 18, 2015

Merry Christmas

Hello! Kara here today with a traditional color Merry Christmas card. It certainly is turning Fall like here in Western PA.  With that brings chilly weather and with chilly weather brings Christmas!
 
I decided to make a tradition color Christmas card using a few different dies.  I used the Delicate Tree from the Whispers collection.  Using green cardstock, I cut the tree and just knew it needed something else. I then took the actual die and traced it on the red cardstock and fussy cut.   The star is a perfect size for the topper and it comes from the Make a Wish set.  The final touches came with using stickles to 'glitterize' and make it sparkle.
 
I love inking up the embossing folder before I run it through my Big Shot, so that is what I did!  It gives such a different look to each embossing.  Using green and red and then running it through my Big Shot.
 
The sentiment Merry Christmas is from the Sweet Wordlet collection Merry Christmas.


Thanks again for stopping by!  Be sure to check out the other amazing Design Team creations here.
As always, when shopping at Die_Versions, save yourself some money and use the code kara15 for 15% off your purchase.  Not valid with other discounts or sales.
 
~Kara